

Cutworms Attacking? Your Step-by-Step Action Plan

You found the damage this morning. Seedlings flat on the soil, stems cut clean.
Here's the good news: cutworm attacks look catastrophic and are actually one of the most fixable garden emergencies. The pest is predictable, the controls are simple, and a single evening of action can stop the losses cold.
What follows is an ordered plan — tonight, this week, and this season — so you always know the next step. Work it in order and don't skip ahead to sprays before the physical defenses are in place.
If you haven't confirmed the culprit yet, our cutworm identification guide will get you certain in a few minutes. And if the damage might be slugs instead, our cutworms vs slugs comparison sorts that out fast — because the playbooks differ.
First: Confirm IN 60 Seconds
Before doing anything, verify. The whole plan below assumes cutworms, and acting on the wrong pest wastes the critical first night.
Check three things:
1. The cut. Stems severed cleanly at or just below the soil line, like a scissor snip? That's cutworm. 2. The top. Is the fallen seedling top still fresh and green, lying beside the stump? Cutworm. 3. The slime. Any silvery slime trails on soil or leaves? If yes, think slugs instead — different playbook.
Still not sure? Tonight's flashlight patrol (step one below) will confirm it definitively.
Tonight: STOP THE Bleeding
Do these this evening, in this order. The goal is simple: no more seedlings lost tonight.
1. Flashlight Patrol (30 Minutes After Dark)
Wait until 2 to 3 hours after sunset — peak cutworm feeding time. Take a flashlight and walk the bed slowly, checking the base of every seedling and the surrounding soil surface.
You'll find them: plump gray-brown caterpillars, often wrapped around a stem or moving across open soil. They freeze when the light hits them. Pick them off and drop them into a bucket of soapy water.
Scratch the top inch of soil around each damaged plant too — cutworms hide curled in a C-shape just under the surface by day, and the ones not yet feeding tonight are waiting there.
One thorough patrol can remove a remarkable fraction of the active population. In a small home garden, this single step sometimes ends the emergency outright.
2. Emergency Collars on Every Survivor
Right after the patrol — tonight, not tomorrow — put collars on every surviving transplant. This is the move that actually holds the line while you work the longer plan this week.
No time to craft perfect collars? Use the fastest options from our DIY cutworm collar guide:
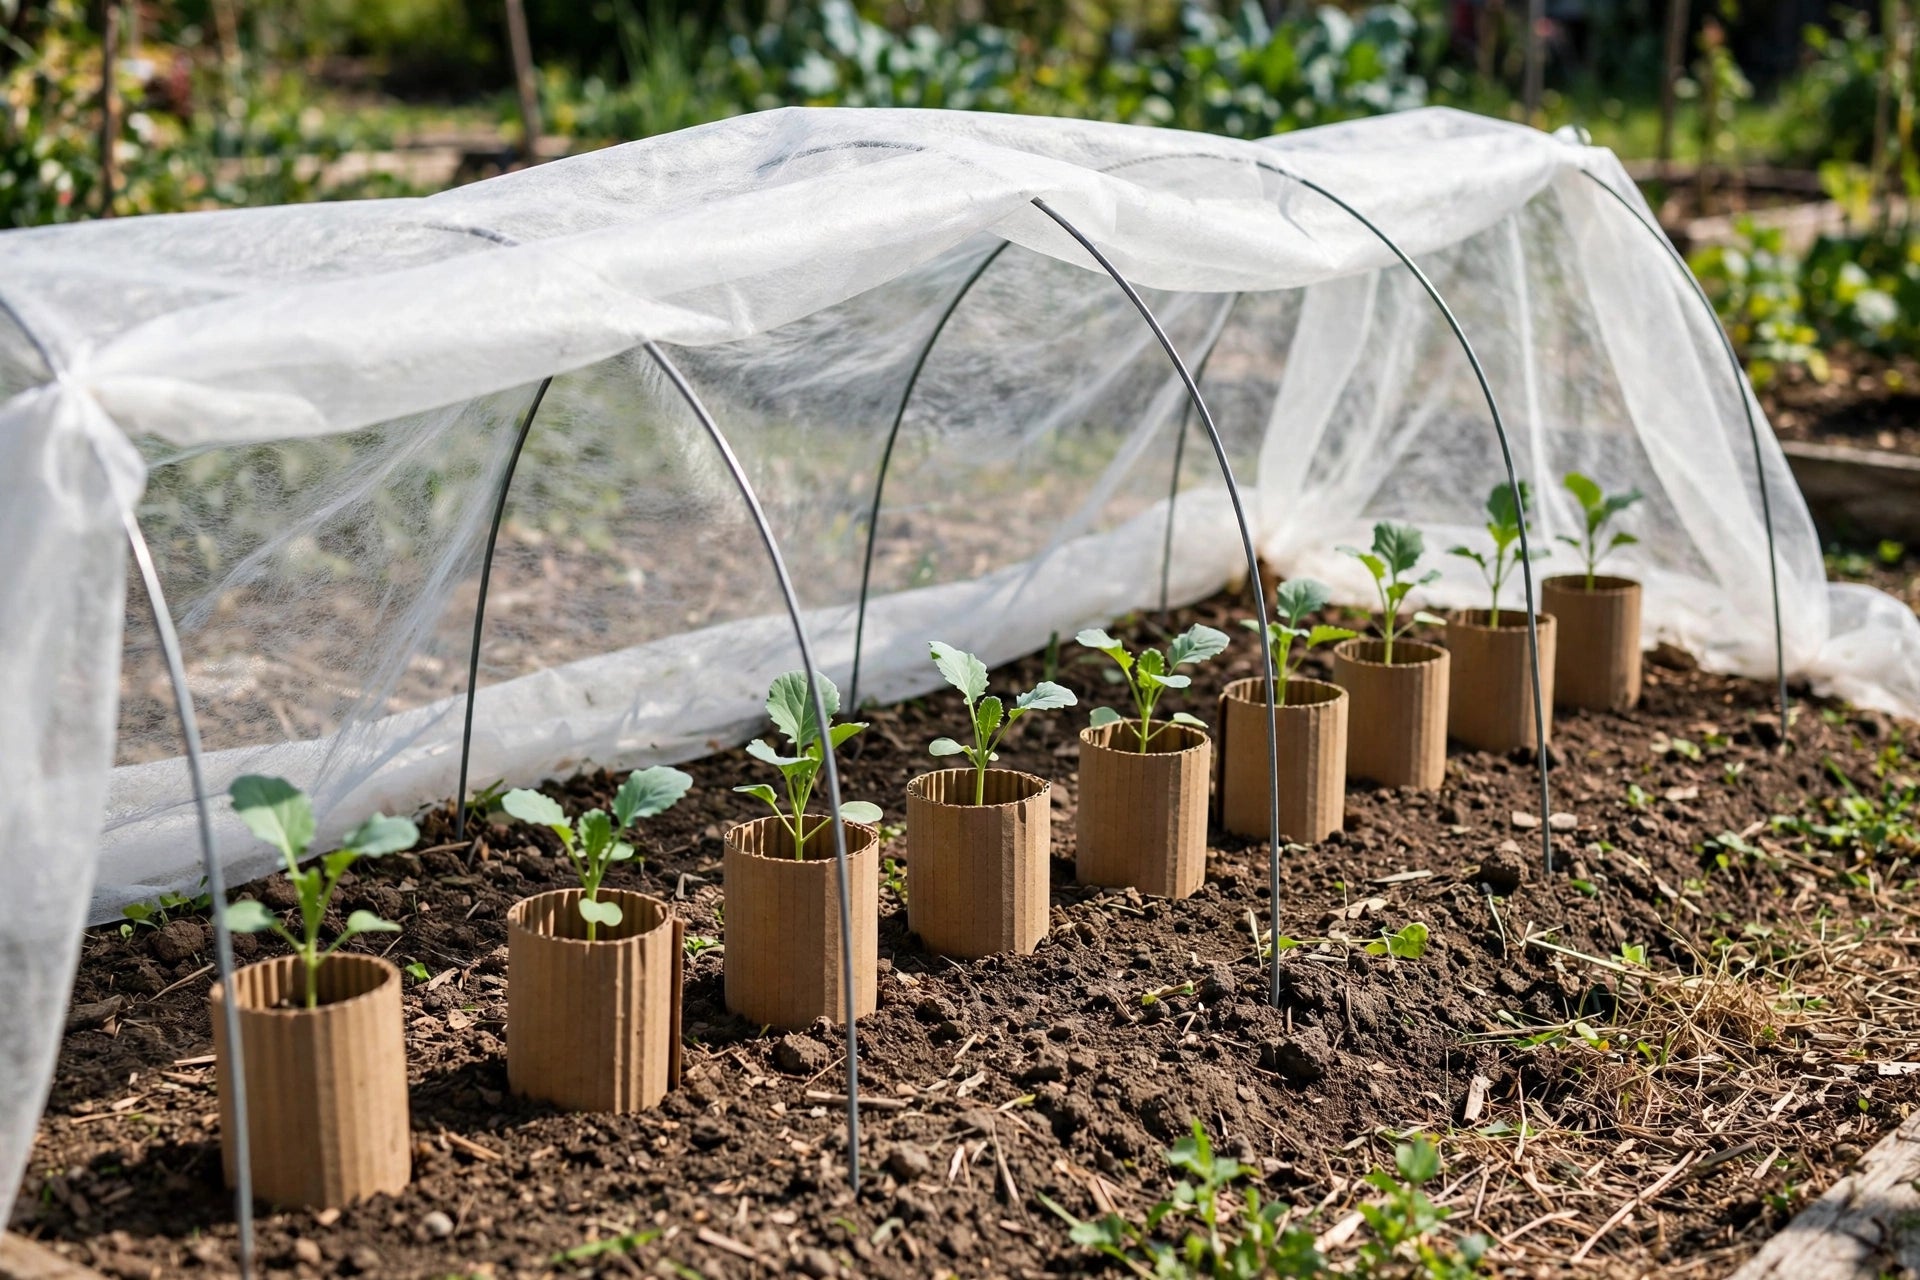
- Aluminum foil: tear a strip, wrap it loosely around each stem base, extending an inch below the soil surface. Thirty seconds per plant. - Plastic cups: cut the bottoms out, slit one side, sink over each seedling. A sleeve of disposable cups collars a whole bed in minutes. - Toilet paper tubes: slit down one side, open around the stem, press an inch into the soil.
Remember the critical detail: sink each collar about an inch into the soil. A collar sitting on the surface leaves the feeding zone exposed.
3. Clear Tonight's Debris
Pull any weeds in and immediately around the bed, and remove boards, dense mulch piles, or debris touching the seedlings. You're removing both egg-laying sites and daytime hiding spots — and denying tonight's survivors easy cover at dawn.
This Week: Lock It Down
The emergency measures bought you time. Now build the defenses that hold for the rest of the vulnerable period.
Collar Everything, Properly
Go back over the bed in daylight and upgrade any rushed nighttime collars: proper height (2 to 3 inches), properly sunk, snug but not tight, soil firmed around the base. Add collars to any transplants you missed.
Start Bt on Schedule
If the planting is large — or patrols keep finding larvae nightly — begin Bacillus thuringiensis (Bt kurstaki) applications. It's the least-toxic spray option extension programs recommend for cutworms, and it targets the young larvae your patrols miss.
Apply in the evening, aimed at the base of plants and the surrounding soil surface. Repeat every 5 to 7 days as labeled while seedlings are vulnerable. Bt works best on young larvae, so starting now beats starting later.
Cover the Bed
Drape lightweight floating row cover over the bed, supported on hoops. This excludes the moths still laying eggs — cutting off the next wave of larvae before it starts. Keep in mind covers don't stop larvae already in the soil, which is why they complement collars and Bt rather than replacing them.
Clean the Surroundings
Mow or clear weedy edges near the bed. Cutworm moths lay eggs on weeds; every weedy strip near your vegetables is a nursery. You don't need a scorched perimeter — just break up the continuous weed habitat.
Keep Patrolling
Two or three more flashlight patrols over the coming week, spaced a few nights apart, catch the larvae that were too small to notice on night one. Larvae hatch in waves; your patrols should too.
THIS Season: Break THE Cycle
Emergency's over, defenses are up. Now play the long game so next season starts clean.
Fall cleanup is the big one. At season's end, remove spent plants, clear weeds from beds and edges, and don't leave debris piled near next year's planting areas. Cutworms overwinter as larvae or pupae in soil and debris — every cleanup removes next spring's attackers. Cornell Extension and UC IPM both emphasize sanitation as foundational cutworm management.
Rethink spring bed prep. Tilling two to three weeks before transplanting exposes overwintering larvae and pupae to birds and drying. If you garden no-till, lean harder on the other methods — the system works either way.
Build beetle habitat. Ground beetles are nocturnal cutworm predators that patrol your beds for free. Undisturbed edges, flat stones, mulch, and — critically — no broad-spectrum insecticides let their population build season after season until cutworm pressure fades to background noise.
Note what happened. Jot down which beds were hit, when, and how bad. Cutworm pressure is often patchy and site-specific — the bed that got hammered this year is the bed to collar preemptively next spring.
Plan transplant timing. The frost date calculator in our gardening tools hub helps you schedule transplant windows. In regions with a sharp spring cutworm peak, shifting your most vulnerable plantings slightly — or simply having collars ready before the first transplant goes out — prevents a repeat.
Replant OR Protect? THE Decision
The question every cutworm-hit gardener faces: replant the losses, or protect what's left and accept a thinner stand?
Replant when:
- It's still early in your planting window for that crop, with enough season left for replacements to mature. Check days-to-maturity against your first expected fall frost. - You have replacement seedlings available — your own extras, or nursery transplants you can buy this week. - Losses were heavy (a third of the bed or more) and the crop matters to you.
Replant with a collar on day one. A replacement planted unprotected into an active cutworm bed is just offering a second dinner.
Protect and accept when:
- The season is getting late and replacements wouldn't mature in time — common with long-season crops like cabbage in short-summer climates. - Losses were light and the remaining plants, once protected, will fill the space. Many vegetables compensate surprisingly well for missing neighbors. - The survivors are already past the vulnerable stage — stems thickening, growth vigorous. Protect them through the tail of the pressure and move on.
The hybrid answer — and often the best one — is both: replant what the calendar allows, collar everything old and new, and run Bt for two weeks. It costs little and covers every outcome.
One more consideration for warm-climate gardeners: where cutworms cycle through multiple generations, "replant later" can mean planting into the next wave. In that case, protection (collars + covers + beetles) matters more than timing tricks, all season long.
For crop-specific protection details, see our guide to cutworms on cabbage seedlings — the collar-and-cover playbook adapts to any transplant.
Wrapping Things Up!
Cutworm damage feels like a disaster at 7 AM and looks like a solved problem by 7 PM. That's the thing about this pest: it's dramatic, but it's also one of the most beatable problems in the garden.
Tonight: patrol and emergency collars. This week: proper collars, Bt, row covers, cleanup. This season: fall sanitation, beetle habitat, and notes for next spring. And the replant question answers itself once you check the calendar.
You've got this. The cutworms don't know it yet, but their season just ended.
Need seedlings to replant or fill the gaps? Browse our vegetable seeds — every variety page links to a free growing guide, so your replacements go out strong.
Frequently Asked Questions
How fast can I stop an active cutworm attack?
One good night. A thorough flashlight patrol plus emergency collars on every surviving transplant — both done tonight — typically ends the losses immediately. The follow-up steps this week (Bt schedule, row covers, repeat patrols) make sure it stays ended.
Should I spray something tonight for fastest results?
No — and that's not just IPM philosophy, it's practical. No spray works faster than handpicking plus collars tonight. Bt needs to be eaten by young larvae over days; broad-spectrum sprays kill your ground beetles and the cutworms rebound first. Physical defenses tonight, Bt this week, biology all season.
My seedlings were cut a week ago and I did nothing. Is it too late?
Not necessarily. Collar the survivors today — cutworms keep feeding as long as vulnerable stems exist, so late protection still prevents further losses. Start Bt if larvae are still active. Then decide on replanting based on your remaining season, as described above.
Will cutworms come back to the same bed next year?
Quite possibly, if the conditions that invited them persist — weedy edges, debris left in place, no predator habitat. That's exactly what the this-season section addresses: fall cleanup and beetle habitat are how you make next spring different from this one.
Do I need to treat the whole garden or just the damaged bed?
Start with the damaged bed — that's where the active larvae are. But scout neighboring beds with new transplants too, especially ones with similar conditions. Cutworm moths lay eggs across areas, not single beds. Collars are cheap insurance on every vulnerable transplant, not just the ones already hit.